
This article means to guide maintenance personnel to replace the CPU board of the Saluki S3602 series vector network analyzer.
1. Preventing Electrostatic Discharge Damage
VNA CPU board is a highly integrated PCB board. Protection against electrostatic discharge is essential while handling it. Human body always carries static electricity which can easily damage sensitive internal circuit elements when discharged. Static discharges is too small to be felt but can cause permanent damage. Please check and ensure the following matters before installing/removing a CPU board.
• Always wear a grounded wrist strap, connected to a grounded conductive table mat.
• Always operate on a grounded, conductive table or a table mat.
• Always wear a heel strap when working in an area with a conductive floor.
• Always ground yourself before any operation to the CPU board.
• Suggested environment humidity <60%
2. Overview of the CPU Board

CPU Board Location
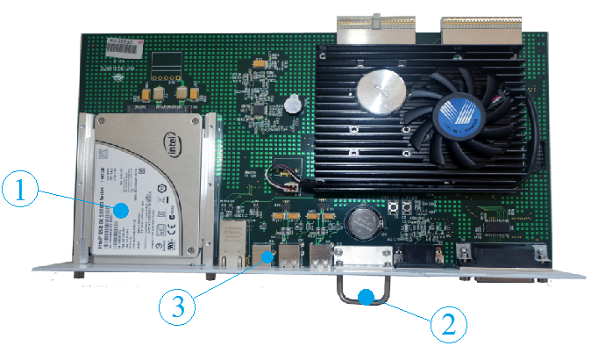
CPU Board Top View
(1) Hard disk (2) Handle (3) Interfaces
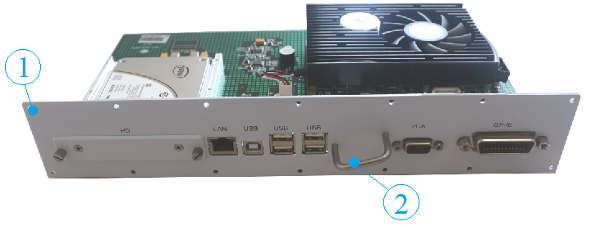
CPU Board Front View
(1) Screw hole (2) Handle
3. Remove/Install CPU Board
Please follow the guide below to remove/install the CPU board.

Step 1: Remove the 14x screws with a proper screw driver.
Step 2: In the VNA, on each side of the board, there is a slide rail.Hold the handle, and pull out the CPU board.
Step 3: Put the board properly.
Step 4: Take off the anti-static bag of the new CPU board.
Step 5: Aim the board edges directly to the slide rail of the VNA.
Step 6: Gently push the board into VNA.
Step 7: Fix the 14x screws.
Step 8: Power on the VNA and test.
(Note: Install S3602 VNA CPU board requires special skills and experience. Qualified maintenance personnel should read this carefully before installing the CPU Board. If you meet difficulties or need advice, please contact Saluki.)
